The Ultimate Guide to Woodworking Joinery: Techniques, Tips, and Applications
Woodworking is a time-honored craft that combines artistry, skill, and precision. Whether you’re constructing a simple bookshelf or a complex piece of furniture, the integrity and aesthetics of your work hinge on the connections you make between different pieces of wood. These connections are formed through various techniques collectively known as joinery.
Joinery encompasses a wide range of methods for fastening, connecting, and securing pieces of wood together. It’s not just about sticking two pieces of wood; it’s about creating strong, durable, and often visually appealing structures that will stand the test of time.
From traditional methods that have been passed down through generations to modern techniques that incorporate advanced materials and tools, woodworking joinery is an essential aspect of craftsmanship.
As you venture into woodworking, understanding the different types of joinery is crucial. Each joint serves a specific purpose and is suited for particular applications, making it imperative to choose the right method for your project.
Selecting the appropriate joinery technique can significantly affect the strength, stability, and overall appearance of your work.

The choice of joinery often reflects the project’s requirements and your personal style. For example, if you’re building a sturdy dining table, a mortise and tenon joint may be the best choice due to its exceptional strength.
Conversely, for a decorative picture frame, a miter joint might be more appropriate for its clean, elegant look.
This guide aims to provide a comprehensive understanding of the various types of joinery, their applications, and the benefits and drawbacks associated with each.
Woodworking is not just a hobby; for many, it is a passion that allows for creativity and personal expression. As you become more familiar with different joinery techniques, you’ll find yourself more confident in your ability to tackle increasingly complex projects.
The knowledge of joinery not only enhances your skill set but also enriches your understanding of how wood behaves and interacts.
In the following sections, we will explore the various types of woodworking joinery in detail, equipping you with the knowledge needed to make informed decisions in your projects.
The Importance of Joinery in Woodworking
Joinery is more than just a method of connecting pieces of wood; it is an essential aspect of woodworking that influences both the functionality and appearance of the final product. The significance of joinery in woodworking can be summarized in the following points:
1. Structural Integrity
The primary purpose of joinery is to create strong connections between wooden components. A well-executed joint ensures that the final piece can withstand weight and stress without falling apart. This is especially important for furniture and cabinetry that will experience regular use.
2. Aesthetic Appeal
Different joinery techniques can add visual interest to a project. While some joints are meant to be hidden, others can be showcased as design features, enhancing the overall beauty of the piece. An understanding of how to incorporate joinery into your designs can elevate your woodworking to an art form.
3. Precision and Fit
Accurate joinery is essential for achieving a tight and flush fit between pieces. Properly executed joints contribute to the overall quality of craftsmanship and ensure that the final product functions as intended. Inaccurate joinery can lead to gaps and misalignment, detracting from the piece’s appearance and function.
4. Ease of Assembly
Understanding various joinery methods allows woodworkers to select the most appropriate joints for their projects, streamlining the assembly process. Some joints can be assembled quickly, while others may require more time and effort. Knowing when to use each type can save you valuable time in your projects.
5. Repairability
Some joinery methods are more forgiving when it comes to repairs. Understanding the different techniques allows woodworkers to choose joints that can be disassembled and reassembled with relative ease. This is particularly useful for pieces that may require adjustments or repairs over time.
Types of Woodworking Joinery
Understanding the various types of joinery is essential for every woodworker. Each joint has its specific uses, advantages, and disadvantages, making it crucial to select the appropriate joint for the task at hand. Here, we’ll delve into the most common types of woodworking joinery, explaining how they work and where they are best applied.
1. Butt Joint
The butt joint is the simplest and most basic type of joinery. It involves joining two pieces of wood end to end or at right angles without any special shaping. While the construction is straightforward, this joint relies heavily on glue or mechanical fasteners for strength, making it less robust than other types of joints.
Applications: Butt joints are commonly used in furniture construction, cabinetry, and frames. They offer a quick solution for assembling projects, but for increased durability, it’s advisable to reinforce them with screws or dowels, especially in load-bearing applications.
Advantages:
- Simple and quick to create
- Requires minimal tools and materials
Disadvantages:
- Lacks strength compared to other joints
- Not suitable for structural applications without reinforcement
2. Miter Joint
The miter joint involves cutting the ends of two pieces of wood at an angle, usually 45 degrees, to create a seamless corner. This joint is favored for its aesthetic appeal in decorative applications like picture frames, moldings, and cabinetry.
Applications: Miter joints are often used in projects where a clean, polished look is desired, such as in frames and decorative trim.
Advantages:
- Creates a visually appealing connection
- Ideal for corners and angles
Disadvantages:
- Requires precision cutting for a tight fit
- Can be less stable without reinforcement
3. Rabbet Joint
A rabbet joint features a notch or recess cut along the edge of one piece of wood, allowing another piece to fit snugly into it. This joint provides additional surface area for gluing and increases structural integrity.
Applications: Rabbet joints are commonly used in cabinet construction, drawer assemblies, and paneling.
Advantages:
- Stronger than butt joints due to increased glue surface
- Enhances alignment during assembly
Disadvantages:
- Requires precise cutting for a snug fit
- May not be as visually appealing as other joints
4. Dado Joint
The dado joint consists of a groove cut into one piece of wood to accommodate another piece. This joint is widely used in cabinetry and shelving applications, providing excellent stability and alignment.
Applications: Dado joints are often used for shelves and panels in cabinets, where strength and stability are essential.
Advantages:
- Provides a large gluing surface
- Strong and durable connection
Disadvantages:
- Requires careful measurement and cutting
- May require specialized tools like dado blades
5. Lap Joint
A lap joint is formed when two pieces of wood overlap, with sections removed to create a flush connection. This joint is known for providing solid and stable bonds, often used in frame construction and furniture.
Applications: Lap joints are frequently employed in situations where strength is needed, such as in frames, fences, and structural applications.
Advantages:
- Increases surface area for gluing
- Simple to create and assemble
Disadvantages:
- Requires precise cutting for a clean fit
- May not provide as much strength as mortise and tenon joints
6. Mortise and Tenon Joint
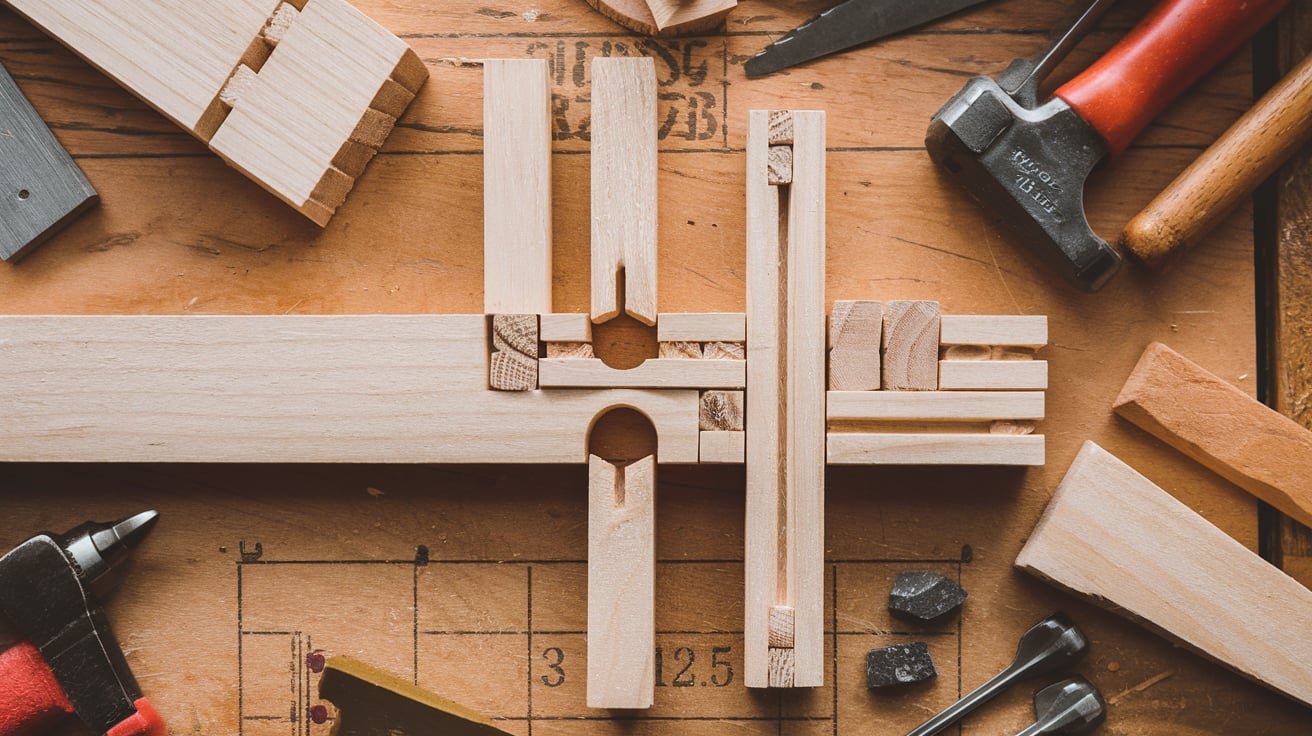
The mortise and tenon joint is a classic technique in woodworking. It involves a protruding tenon on one piece that fits into a corresponding mortise on another piece. This joint is known for its strength and durability, making it ideal for furniture and frame construction.
Applications: Mortise and tenon joints are commonly used in high-quality cabinetry, tables, and chairs, where strength is essential.
Advantages:
- Offers unmatched strength and stability
- Allows for precise alignment
Disadvantages:
- Requires careful measurement and cutting
- More complex to execute compared to other joints
7. Finger Joint (Box Joint)
The finger joint, also known as a box joint, features interlocking fingers cut into the ends of two pieces of wood. This joint is particularly effective for corner joints in drawer construction and box-making.
Applications: Finger joints are used in drawers, boxes, and any application where strong corners are needed.
Advantages:
- Provides excellent strength and alignment
- Aesthetically pleasing with interlocking fingers
Disadvantages:
- Requires precision cutting
- May be more challenging to execute without specialized tools
8. Spline Joint
A spline joint involves inserting a thin strip of wood, called a spline, into matching grooves cut into two pieces of wood. This joint enhances strength and alignment, often used in tabletops and paneling.
Applications: Spline joints are commonly used for panels, tabletops, and other flat surfaces.
Advantages:
- Increases stability and alignment
- Offers a clean and professional appearance
Disadvantages:
- Requires accurate cutting of both grooves and spline
- May not be as strong as some other joints without reinforcement
9. Doweling Joint
A doweling joint uses wooden dowels inserted into matching holes drilled into two pieces of wood. This joint is widely used in furniture and cabinetry, providing excellent alignment and strength.
Applications: Doweling joints are often employed in cases where a seamless appearance is desired, such as in cabinets and furniture.
Advantages:
- Offers strong connections with good alignment
- Can be used in various applications
Disadvantages:
- Requires precise drilling for optimal results
- Can be time-consuming to set up
10. Bridle Joint
The bridle joint is similar to the mortise and tenon joint, but the tenon extends through the mortise, creating a visible connection. This joint is commonly used in frame construction and doors.
Applications: Bridle joints are often found in doors, frames, and furniture where visible joints can enhance aesthetics.
Advantages:
- Provides excellent strength and stability
- Visually appealing in certain applications
Disadvantages:
- Requires careful cutting and fitting
- More complex to execute than simpler joints
11. Pocket Hole Joint
The pocket hole joint involves drilling an angled hole into one piece of wood to allow a screw to connect it to another piece. This joint is favored for its speed and ease of assembly.
Applications: Pocket hole joints are popular in cabinetry and general woodworking projects, where hidden fasteners are desired.
Advantages:
- Quick and easy to assemble
- Creates strong connections with hidden fasteners
Disadvantages:
- May not provide the same level of strength as traditional joints
- Requires specialized jigs for best results
12. Biscuit Joint
The biscuit joint employs a small, oval-shaped piece of wood (biscuit) inserted into matching slots cut into two pieces of wood. This joint is particularly effective for joining panels and edges.
Applications: Biscuit joints are commonly used for tabletops, cabinetry, and other applications where alignment and strength are critical.
Advantages:
- Provides excellent alignment and strength
- Easy to create with the right tools
Disadvantages:
- Requires a biscuit joiner for cutting slots
- May not be as strong as some traditional joints
13. Cam Lock Joint
A cam lock joint utilizes a cam lock mechanism to secure two pieces of wood together. This joint is commonly found in ready-to-assemble furniture, allowing for quick assembly and disassembly.
Applications: Cam lock joints are widely used in flat-pack furniture, providing convenience and ease of assembly.
Advantages:
- Allows for quick assembly and disassembly
- Convenient for ready-to-assemble furniture
Disadvantages:
- May not offer the same strength as traditional joints
- Requires precise alignment during assembly
14. Lap Joint with Dowels
The lap joint with dowels combines a traditional lap joint with dowels for added strength and alignment. This joint allows two overlapping pieces of wood to be secured together.
Applications: Lap joints with dowels are often used in furniture and cabinetry, providing a robust connection.
Advantages:
- Increases strength and prevents movement
- Versatile and visually appealing
Disadvantages:
- Requires precise cutting and drilling
- Can be time-consuming to set up
15. T-slot Joint
The T-slot joint features a T-shaped slot cut into the edge of one piece of wood, allowing another piece to fit in and be secured with a fastener. This joint is commonly used in modern furniture design.
Applications: T-slot joints are popular in applications requiring adjustments or reconfiguration, such as modular furniture.
Advantages:
- Easy to assemble and disassemble
- Provides flexibility in design and construction
Disadvantages:
- Requires specialized tools for creating T-slots
- May not be as strong as traditional joints
Modern Joints
Modern joints incorporate contemporary materials and techniques, often utilizing fasteners, adhesives, and specialized hardware. Here are some common modern joinery techniques:
1. Pocket Hole Joint
Description: A pocket hole joint involves drilling a hole at an angle into one piece of wood, allowing a screw to connect it to another piece.
Applications: This joint is widely used in cabinetry, furniture, and general woodworking.
Advantages: It is quick and easy to assemble and creates strong connections.
Disadvantages: Pocket hole joinery may require a specialized jig for drilling.
2. Biscuit Joint
Description: A biscuit joint uses a small, oval-shaped piece of wood (biscuit) that is inserted into matching slots cut into two pieces of wood, which are then glued together.
Applications: This joint is commonly used for joining panels and edges.
Advantages: Biscuit joints provide alignment and increase strength and are easy to use.
Disadvantages: They require a biscuit joiner, which can be an additional investment.
3. Cam Lock Joint
Description: A cam lock joint uses a cam lock to secure two pieces of wood together, often found in ready-to-assemble furniture.
Applications: This joint is commonly used in flat-pack furniture.
Advantages: It allows for quick assembly and disassembly without specialized tools.
Disadvantages: The strength may not match that of traditional joints.
4. Lap Joint with Dowels
Description: This joint combines a lap joint with dowels for added strength and alignment.
Applications: It is used in furniture and cabinetry.
Advantages: It increases strength and stability.
Disadvantages: It requires precise cutting and drilling.
5. T-slot Joint
Description: A T-slot joint features a T-shaped slot cut into the edge of one piece, allowing another piece to fit in and be secured with a fastener.
Applications: This joint is commonly used in modern furniture design.
Advantages: It allows for easy adjustments and reconfiguration.
Disadvantages: It requires specialized equipment to create T-slots.
Choosing the Right Joinery Technique
Selecting the appropriate joinery technique for your project depends on several factors, including:
1. Project Requirements
Consider the functional requirements of your project. Structural joints need to be strong and durable, while decorative joints can focus more on aesthetics. Some projects, such as cabinets or tables, require joints that can bear significant weight, while others may prioritize design over strength.
2. Material Type
Different types of wood and materials may lend themselves better to certain joinery techniques. Hardwoods may require more robust joints, while softer woods might be suitable for simpler connections. It’s essential to understand the characteristics of the materials you are working with to choose the most appropriate joint.
3. Skill Level
Assess your skill level and the tools available to you. Some joints require advanced techniques and specialized tools, while others are more beginner-friendly. If you are new to woodworking, starting with simpler joints can help you build your skills before tackling more complex joinery methods.
4. Aesthetic Preferences
Consider how the joinery will affect the final appearance of your piece. Some joints, such as mortise and tenon, can be showcased as part of the design, while others may be hidden. Think about how you want the joints to contribute to the overall look of your project.
5. Time and Efficiency
Some joinery techniques are quicker to assemble than others. If you are working on a tight deadline, you may want to choose joints that can be completed efficiently without sacrificing quality.
Essential Tools for Joinery
A well-equipped workshop is crucial for executing woodworking joinery with precision and accuracy. Here are the essential tools you will need for various joinery techniques:
1. Hand Tools
- Chisels: Essential for cutting and shaping joints, especially for mortise and tenon joints. A good set of chisels with various widths will allow for versatility in your joinery work.
- Hand Saw: A quality hand saw is necessary for making precise cuts, especially for traditional joints. Choose a saw that feels comfortable in your hand for the best control.
- Marking Tools: Marking gauges, squares, and pencils are essential for accurate measurements and marking cut lines on wood.
- Clamps: Various types of clamps, including bar clamps, pipe clamps, and corner clamps, are necessary to hold joints together while the glue dries.
2. Power Tools
- Table Saw: A table saw is invaluable for making accurate straight cuts, especially for creating grooves and dados.
- Miter Saw: A miter saw is essential for making angled cuts, particularly for miter joints and precise crosscuts.
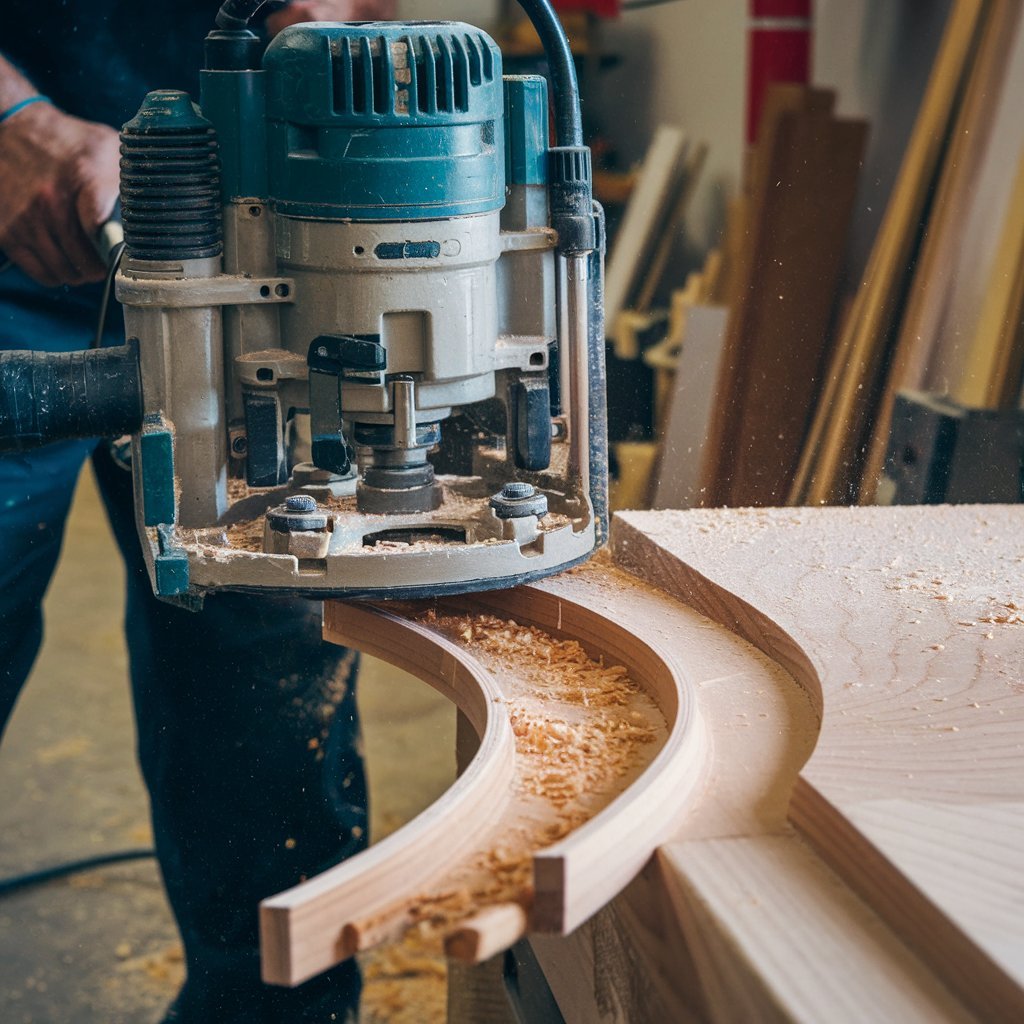
- Router: A router allows for creating grooves, rabbets, and decorative edges, making it a versatile tool for joinery.
- Drill/Driver: A cordless drill is necessary for drilling holes and driving screws in various joints.
3. Specialized Tools
- Biscuit Joiner: If you plan to use biscuit joints, a biscuit joiner is essential for cutting the necessary slots.
- Pocket Hole Jig: For pocket hole joinery, a pocket hole jig is a useful tool that simplifies the drilling process.
- Dowel Jigs: Dowel jigs help ensure precise dowel placement in joints, providing stronger connections.
- Tenon Jigs: If you plan to cut tenons for mortise and tenon joints, a tenon jig is a valuable investment.
Tips for Mastering Joinery Techniques
Mastering woodworking joinery requires practice, patience, and attention to detail. Here are some tips to help you improve your joinery skills:
1. Practice on Scrap Wood
Before tackling your main project, practice your joinery techniques on scrap pieces of wood. This will help you become comfortable with the cuts and improve your precision. Experimenting with different joints on scrap wood will also allow you to troubleshoot any issues before working on your final piece.
2. Measure Twice, Cut Once
Always double-check your measurements before cutting. Accuracy is critical in joinery, and a small mistake can lead to significant issues down the line. Use a measuring tape and marking tools to ensure your measurements are precise.
3. Use the Right Glue
Choose the appropriate wood glue for your project. PVA glue (polyvinyl acetate) is commonly used for general woodworking, while epoxy may be better for high-strength applications. Always follow the manufacturer’s instructions for the best results.
4. Don’t Rush
Take your time with each joint. Rushing can lead to mistakes, which may compromise the quality of your work. Focus on achieving precision rather than speed to ensure a high-quality finished product.
5. Keep Tools Sharp
Ensure that your chisels, saws, and other cutting tools are sharp. Dull tools can make the process more difficult and result in poor-quality cuts. Regularly sharpen your tools to maintain their effectiveness.
6. Experiment with Different Joints
Don’t be afraid to try new joinery techniques. Experimentation can lead to creative solutions and enhance your skills. Push yourself to explore different joints and their applications in various projects.
7. Seek Feedback
Share your work with fellow woodworkers or join woodworking forums. Constructive feedback can help you identify areas for improvement. Engaging with a community of woodworkers can also provide valuable insights and inspiration.
8. Study Existing Work
Analyze furniture and woodworking pieces to see how different joinery techniques are employed. This can inspire your projects and deepen your understanding of the craft. Pay attention to how joints are used in high-quality pieces.
9. Join a Woodworking Community
Connecting with other woodworkers can provide valuable insights, tips, and support as you develop your skills. Whether through local clubs or online forums, engaging with a community can enrich your woodworking journey.
10. Stay Organized
Keep your workspace tidy and organized. A cluttered area can lead to accidents and hinder your progress. Designate specific areas for your tools and materials to improve efficiency and safety in your workshop.
Wrapping Up
Woodworking joinery is a vital aspect of the craft, providing the means to create strong, functional, and beautiful pieces. By understanding various joinery techniques and practicing them diligently, woodworkers can elevate their skills and produce stunning results. Whether you prefer traditional methods or modern techniques, mastering joinery opens up a world of possibilities for your woodworking projects.
As you continue your woodworking journey, remember that patience, precision, and a willingness to learn are the keys to becoming a proficient artisan. So gather your tools, pick a project, and let your creativity shine through the art of woodworking joinery!


